By connecting business systems, such as Oracle NetSuite, you make it faster and easier for investors to make a decision about financing your company. To learn more about the benefits connecting your business systems to Hum Capital's Intelligent Capital Market (ICM), visit this article.
Connecting your NetSuite account to Hum's ICM is simple. Please follow these steps:
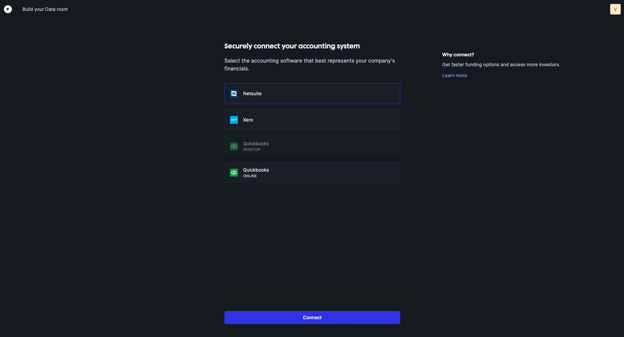
Step 1) Log into your Hum ICM account
Step 2) Click on Data Sharing (top menu), then Connectors (left menu)
Step 3) Select Add linked account under Accounting systems tab
Step 4) From the list, choose NetSuite
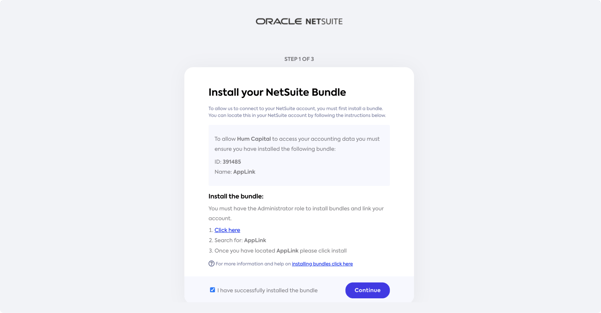
Step 5) You will be redirected to an Oracle website giving further instructions. The first step here is to install the “NetSuite Bundle”:
Step 6) Click on the link next to 1), and you will be directed to log into your Oracle NetSuite account:
Step 7) After entering your Oracle NetSuite account credentials, you will see this screen. Under the “Customization” tab, enter the keyword “AppLink” (per item 2) in the above screen:
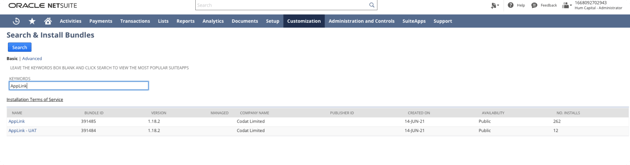
Note that the “COMPANY NAME” is listed as “Codat Limited” and that there are two Bundles listed here.
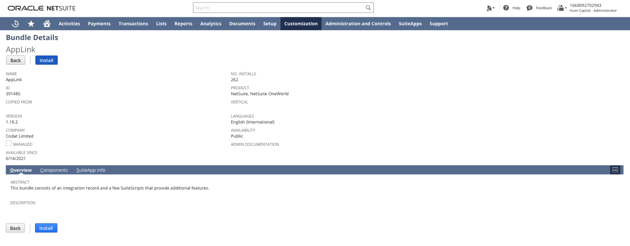
Choose the one named “AppLink” (per item 3 in the above screen), not “AppLink-UAT”. Note that the “BUNDLE ID” will match the ID in the above screenshot. Click on the name of “AppLink”, and you will see this screen:
Step 8) Here, click the blue “Install” button.
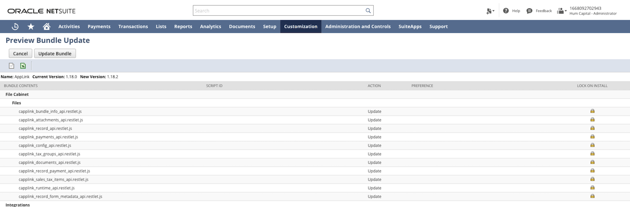
Step 9) Then, you will see the “Preview Bundle Update” screen, and depending on whether you have already installed the bundle, there will be a button that either says “Update Bundle” or “Install Bundle.” Click it.
Step 10) Then, back in this window:
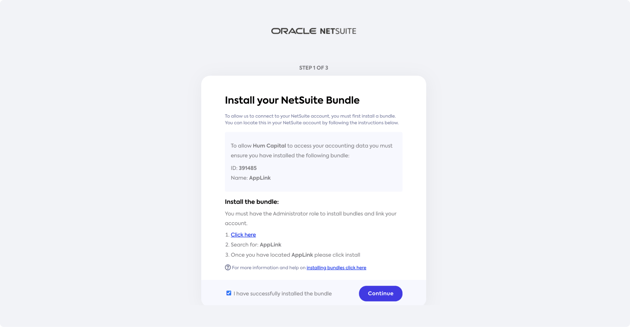
Check the box at the bottom “I have successfully installed the bundle,” and then “Continue”.
Step 11) You will now be at “Step 2 of 3”:
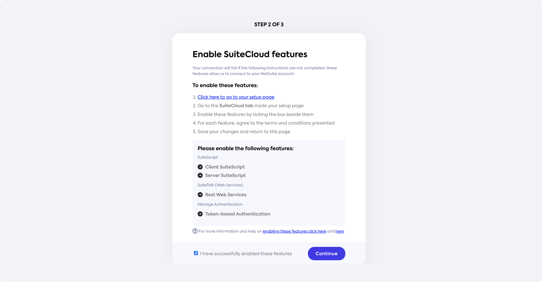
Follow the 5 instructions to enable the the new features, then check the box at the bottom “I have successfully enabled these features”, then “Continue”.
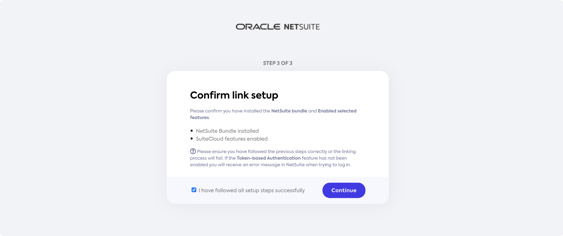
Step 12) You will now be at “Step 3 of 3”. Check the box at the bottom and click “Continue”.
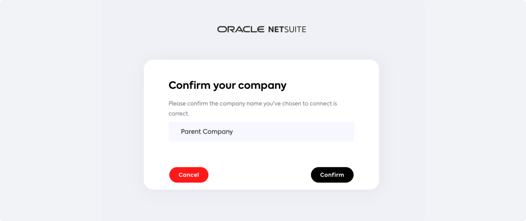
Step 13) Then, in the screen shown below, click “Allow”: Step 14) If you have more than one company in your NetSuite account, you’ll be asked to choose which one to connect:
Step 15) After this, you will be redirected back to your Hum ICM account, where there will now be a green “CONNECTED” status shown to the right of the “NetSuite” data source.
This confirms that you have successfully connected your NetSuite account to ICM. If you have any further questions or need any further assistance, please contact Support.